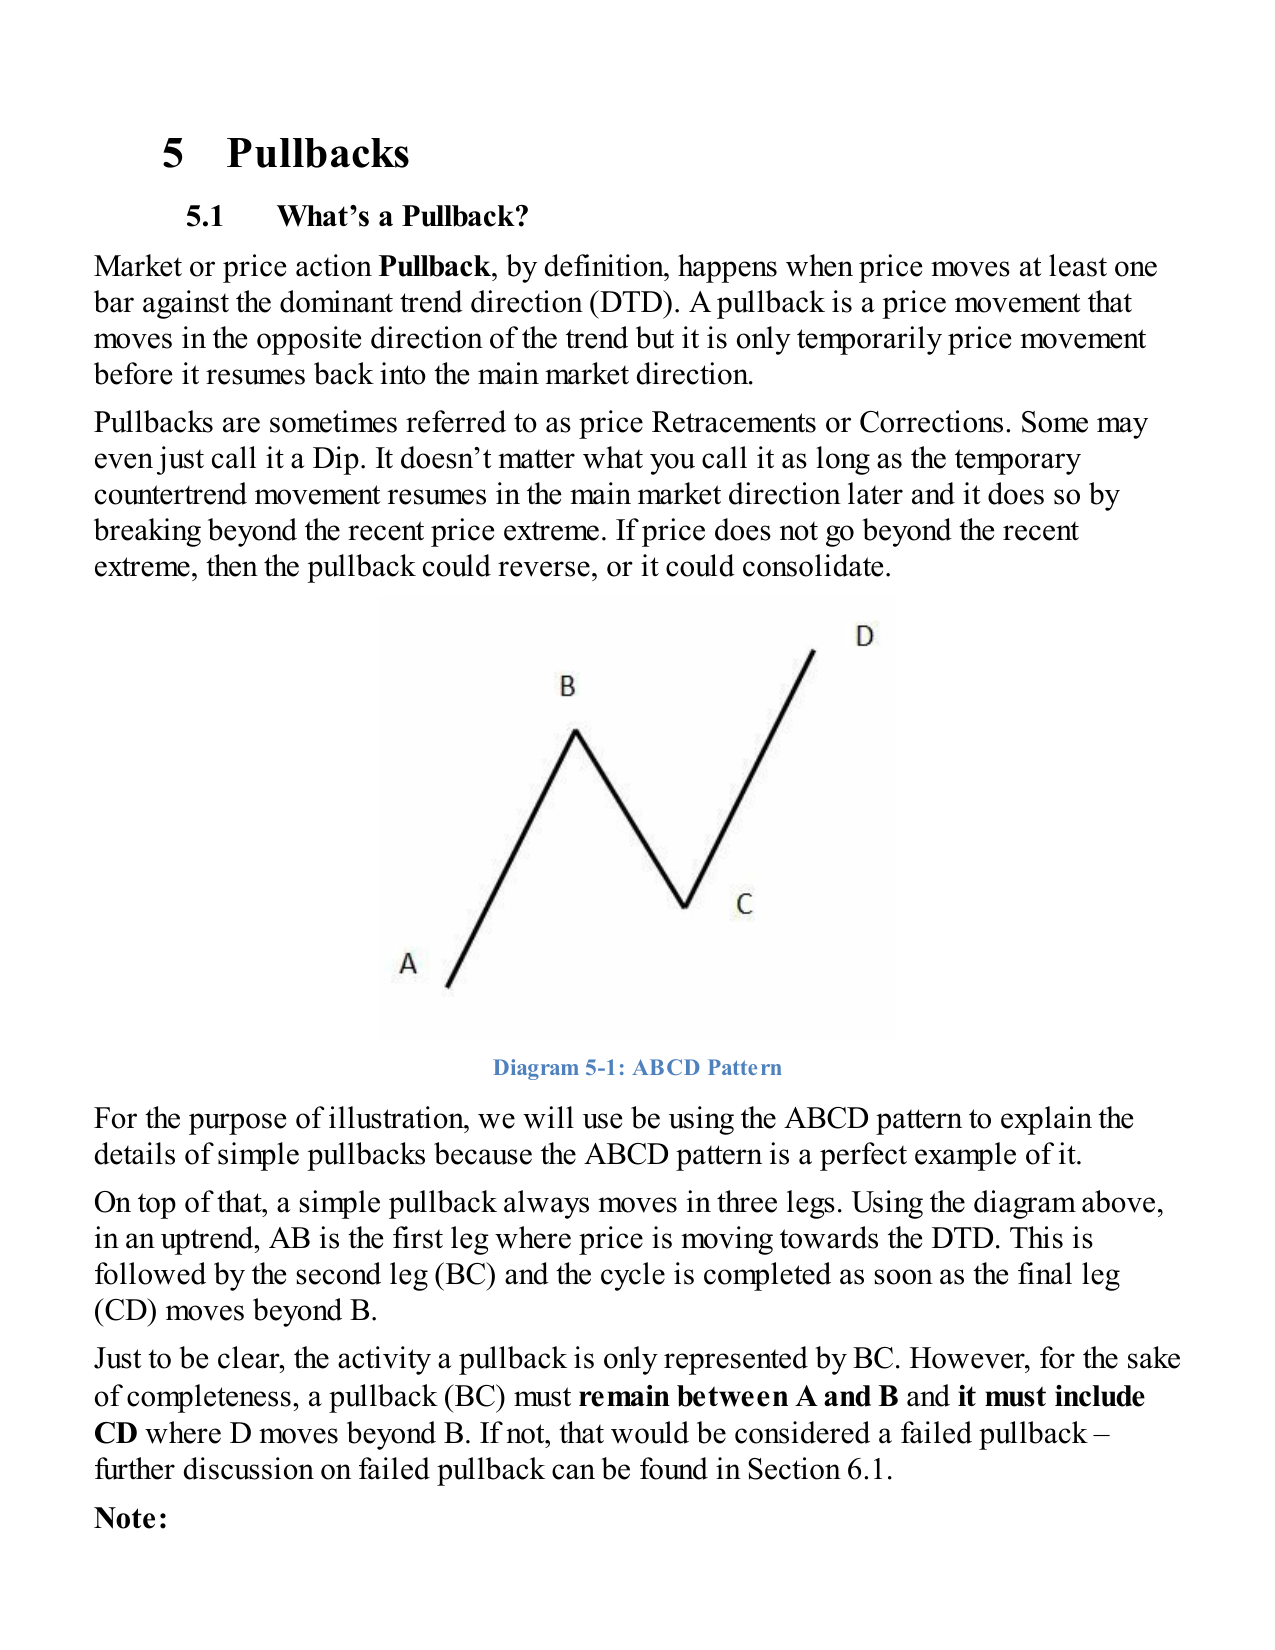
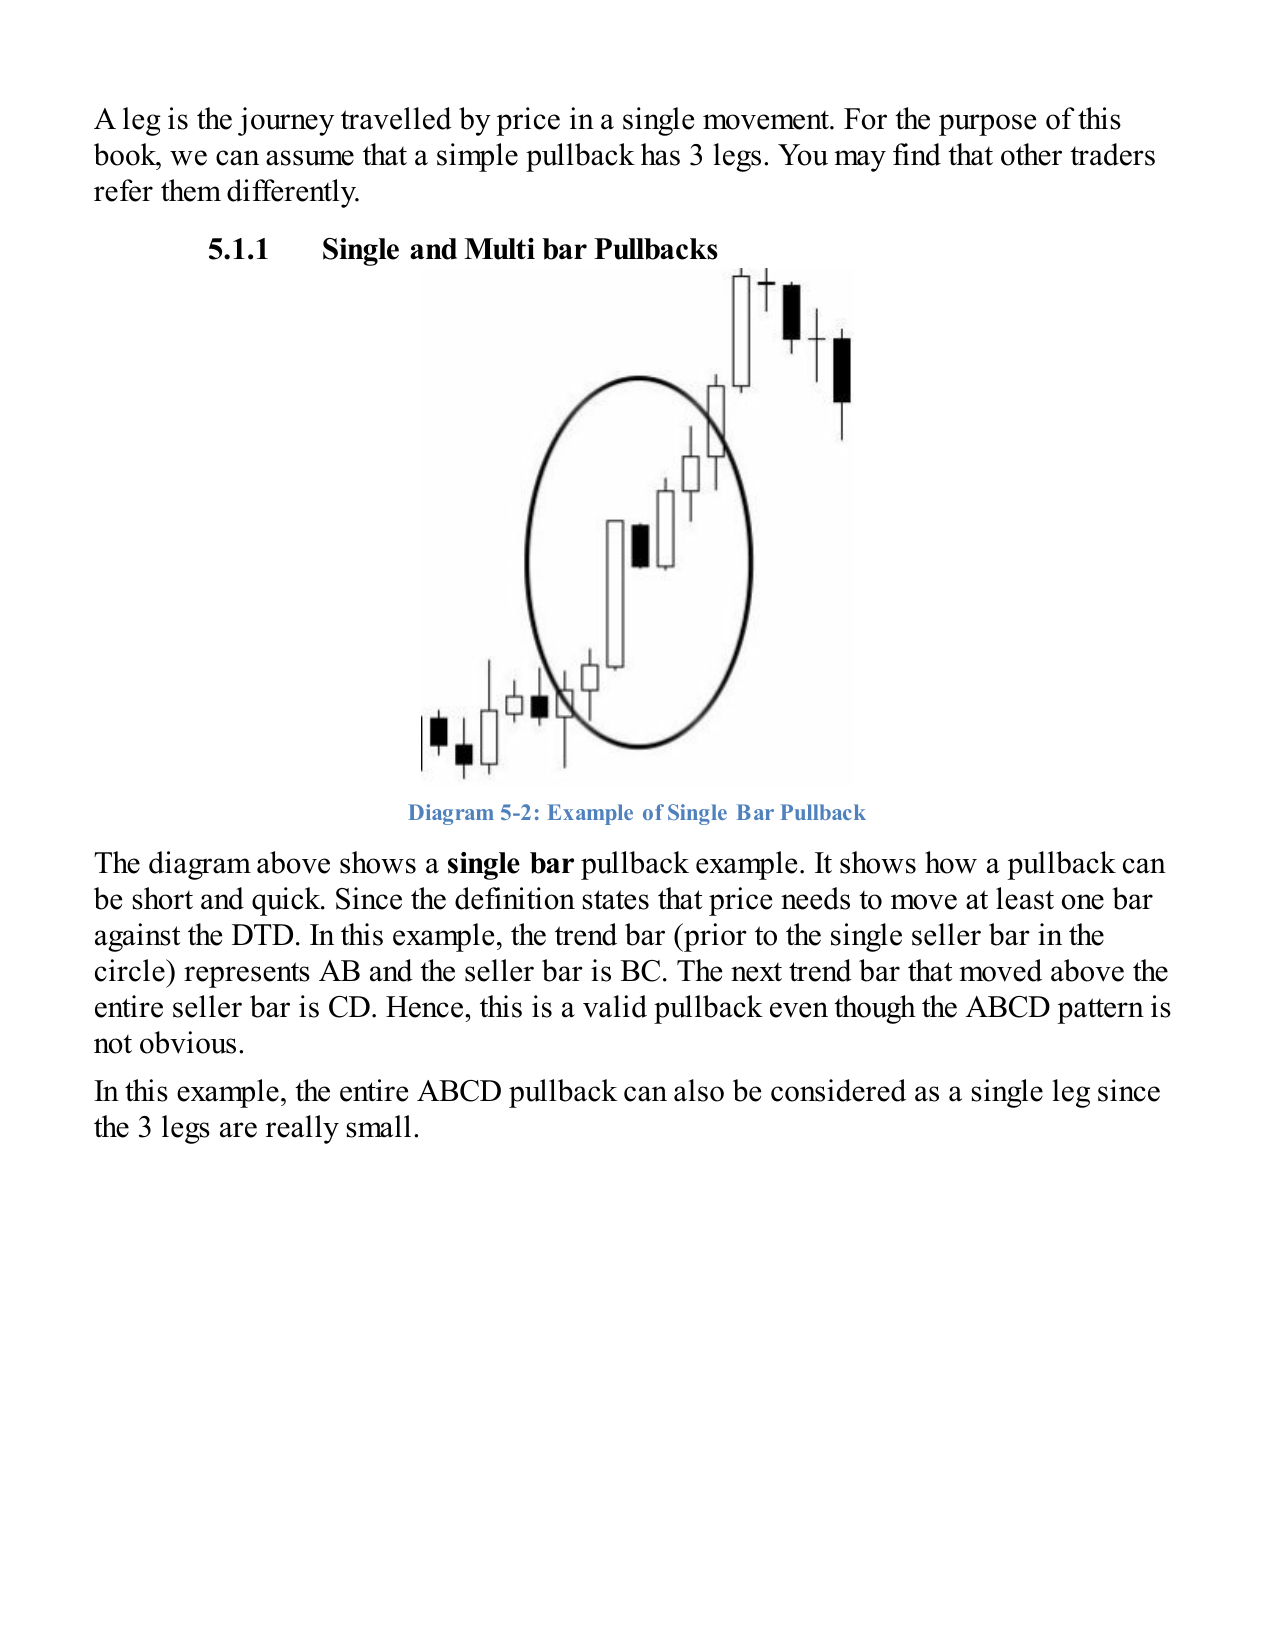
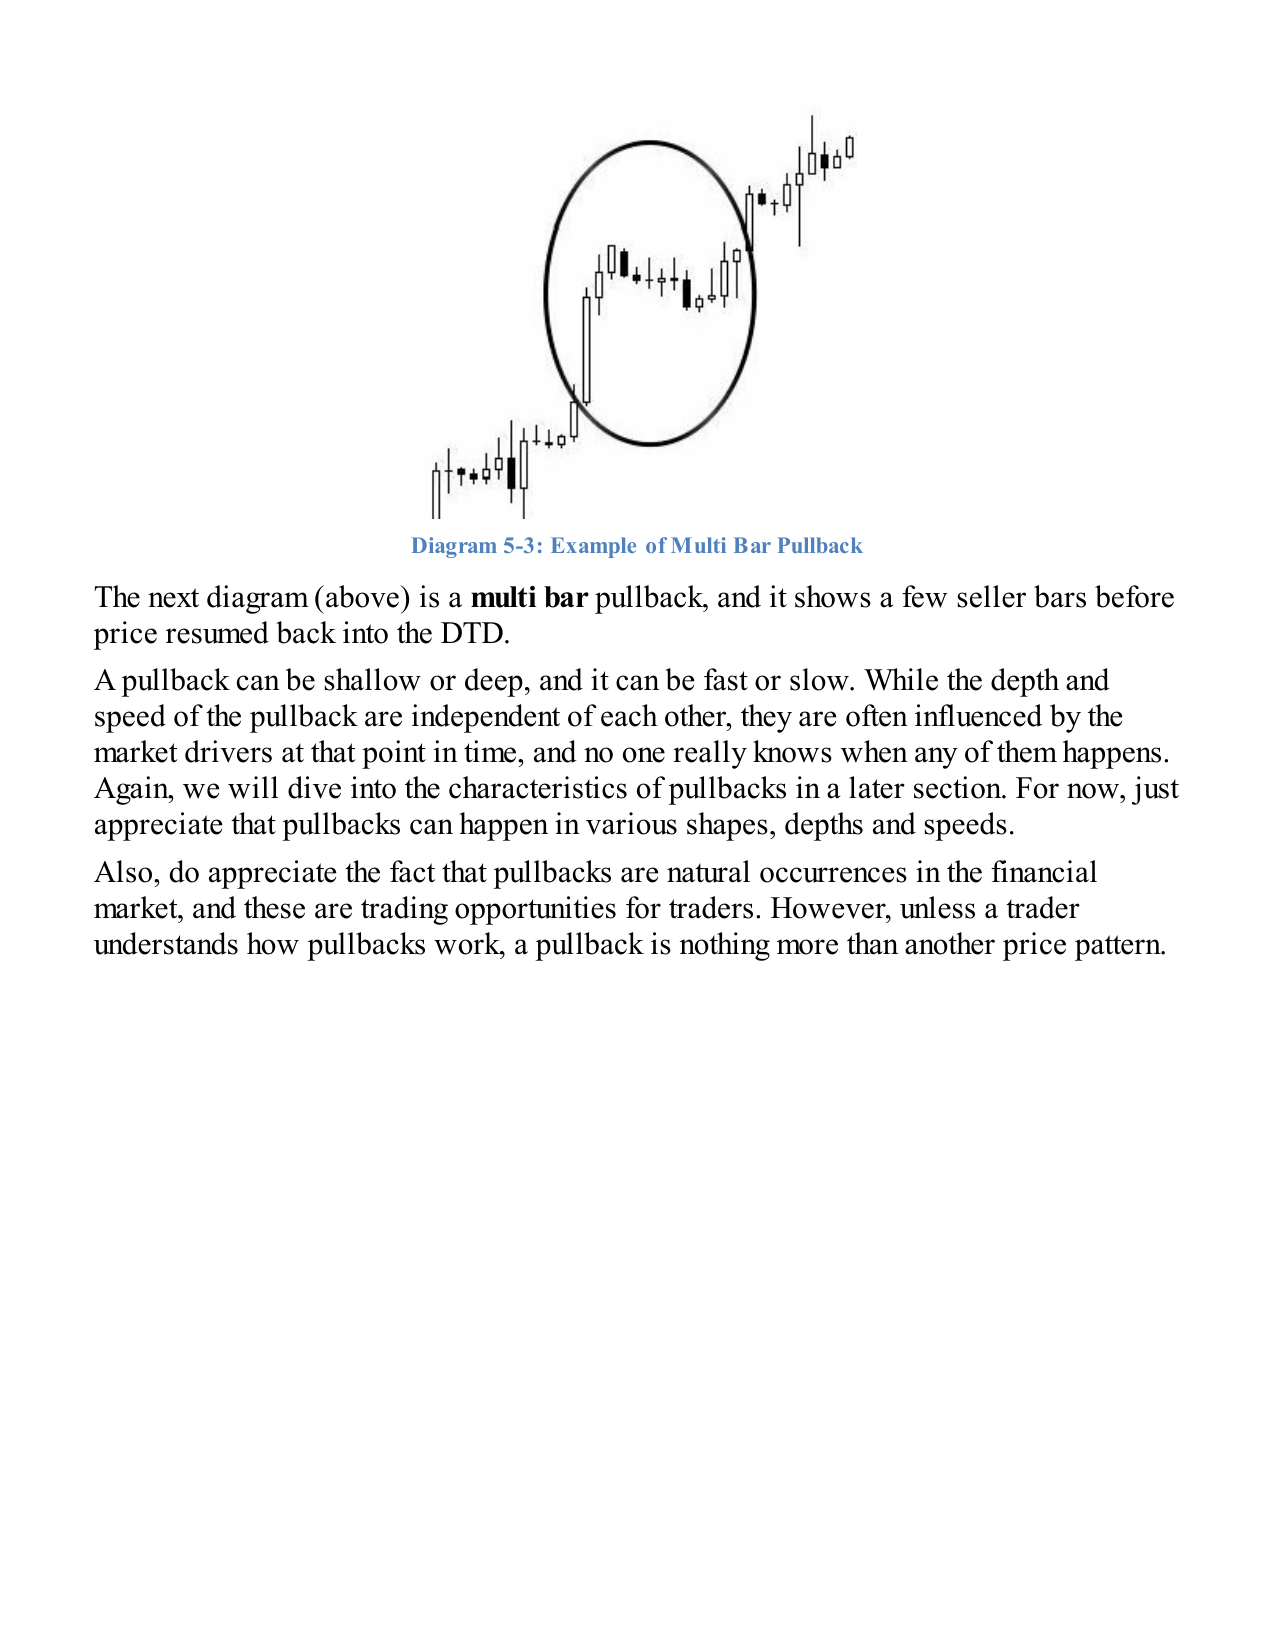
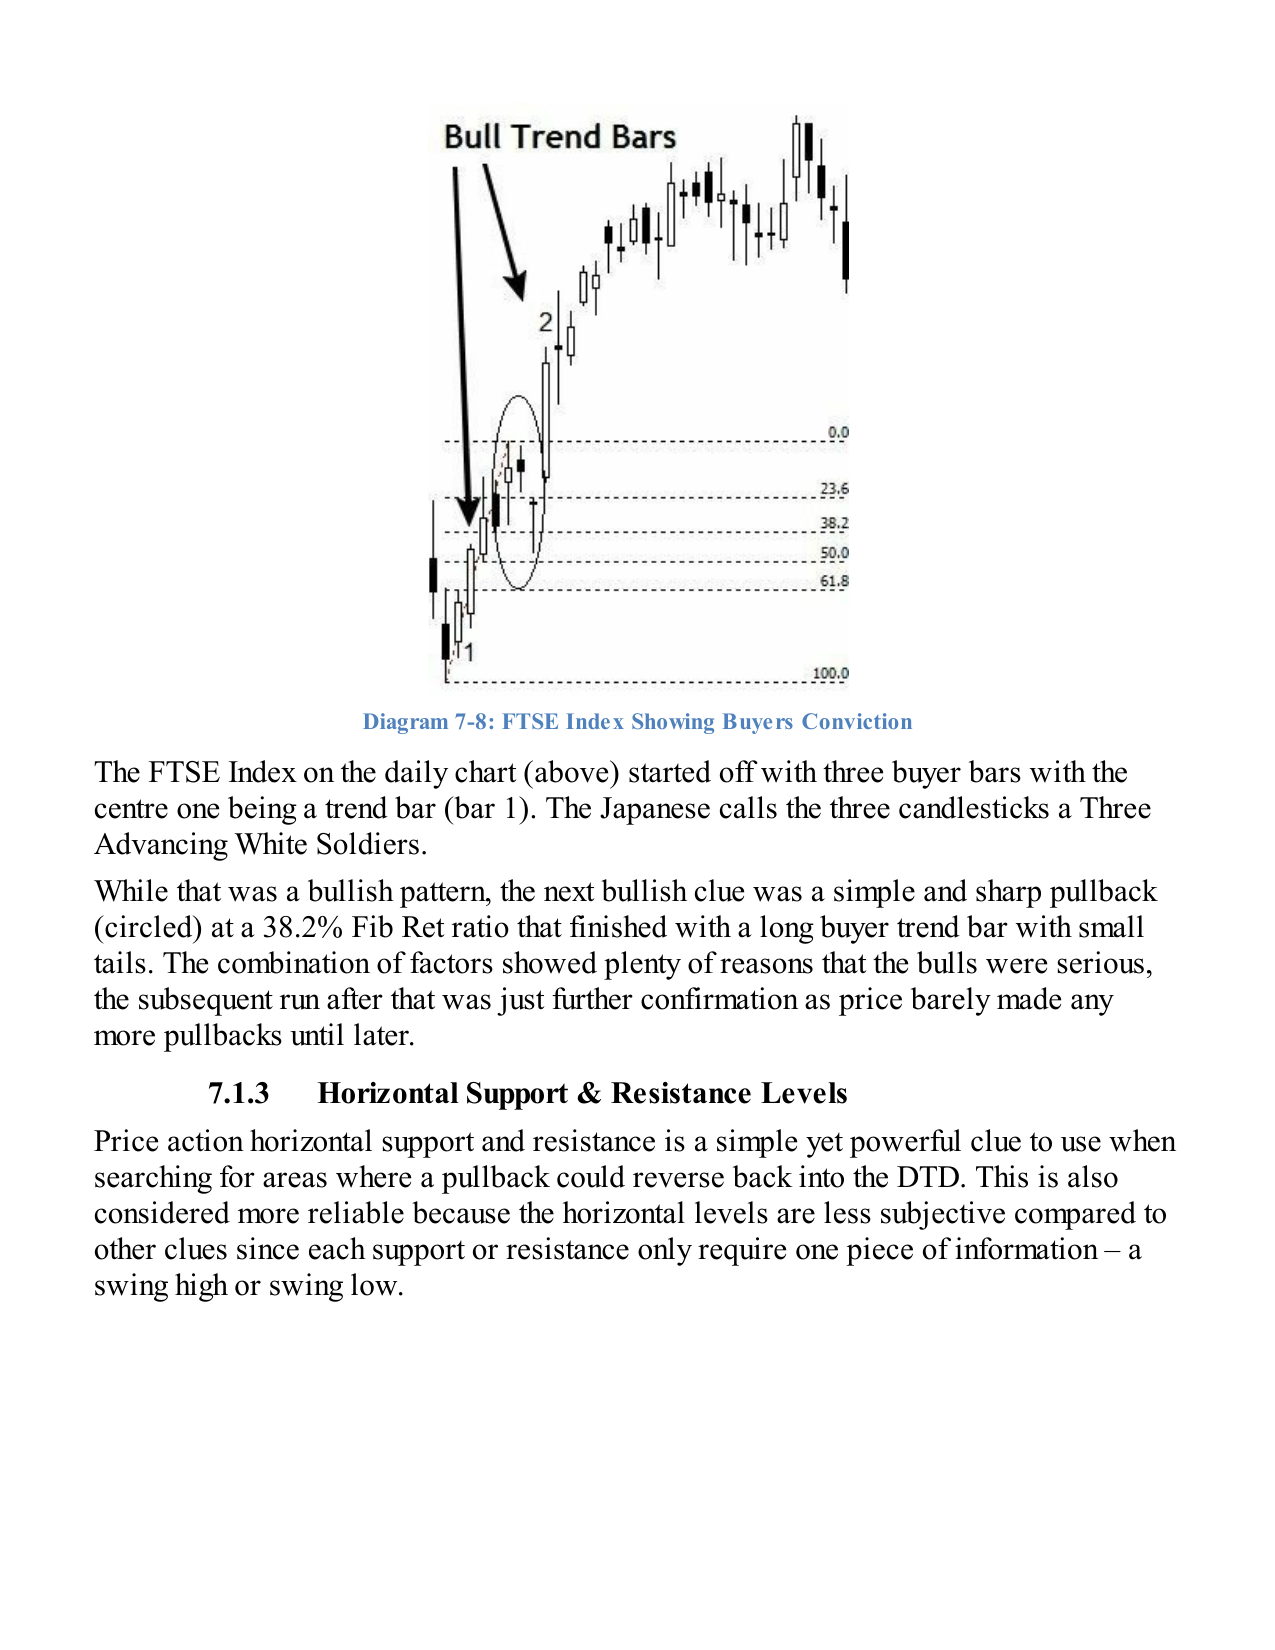
Pullback Entry Playbook
A practical decision guide for buying controlled weakness inside strong trends
A pullback entry is not buying because price has fallen. It is buying a strong stock or coin after controlled weakness, once buyers show evidence that they are returning.
The 10/20 EMA zone is the area of interest. The turn back up is the entry trigger. The pullback low, 20 EMA, or failed breakout level is the invalidation area.
1. The Pullback Decision Tree
Trend is strong, this is an early pullback, support holds, buyers reappear, and the stop is close enough for sensible reward:risk.
Price is in the right area, but there is no turn yet. Let the next candle or lower-timeframe structure prove demand.
Price slices through support, sell volume expands, the 20 EMA fails decisively, or the chart has become messy chop.
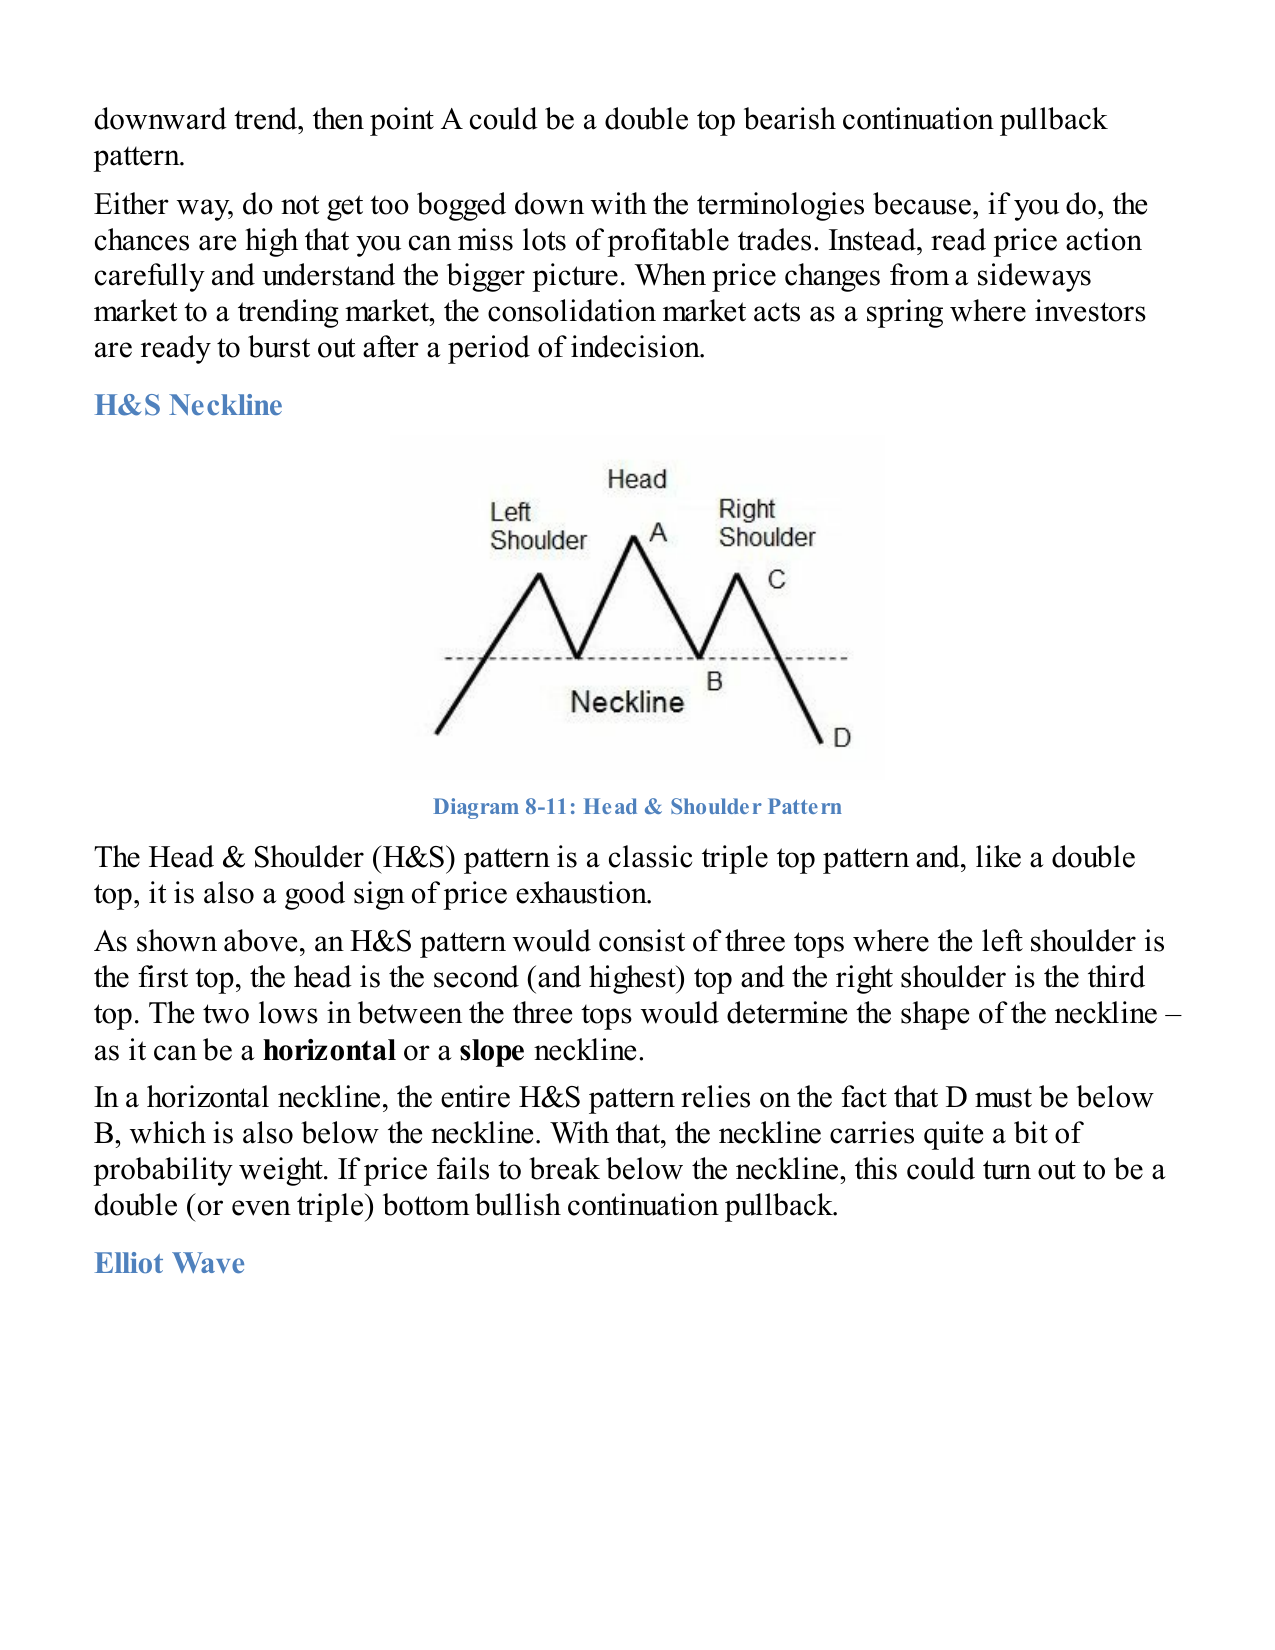
Pattern reference
2. What Must Be True Before Buying?
A. Strong stock first
- Price is above the 50 SMA and preferably above the 200 SMA.
- The 10 EMA and 20 EMA are rising or curling upward.
- There has already been a strong impulse move, breakout, gap, earnings reaction, or clear relative strength.
- The stock or coin is not merely falling in a larger downtrend.
B. Controlled weakness
- Pullback candles are smaller than the impulse candles.
- Volume cools compared with the original breakout or launch.
- Price is pulling into a logical area: 10 EMA, 20 EMA, VWAP, prior breakout support, or Fib confluence.
- The move does not look like panic selling or a clean breakdown.
C. Buyers reappear
- Break above the previous candle high.
- Reclaim of the 10 EMA or 20 EMA.
- Higher low on the lower timeframe.
- Break of a small descending pullback trendline.
- Green candle with improving volume after testing support.
D. Invalidation is obvious
- Below the pullback low.
- Below the 20 EMA if that is the level being used.
- Below VWAP for intraday VWAP setups.
- Below the failed breakout retest level.
- If the stop is too far away, the entry is probably too late.
3. The Practical Rule
The simplified rule is:
The moving average is not the buy signal. It is the place to pay attention. The actual entry comes when the chart gives evidence that the pullback is ending.
4. Pullback Examples
Coming Soon
Real pullback examples with annotated charts will be added here.
5. Book Diagram Examples
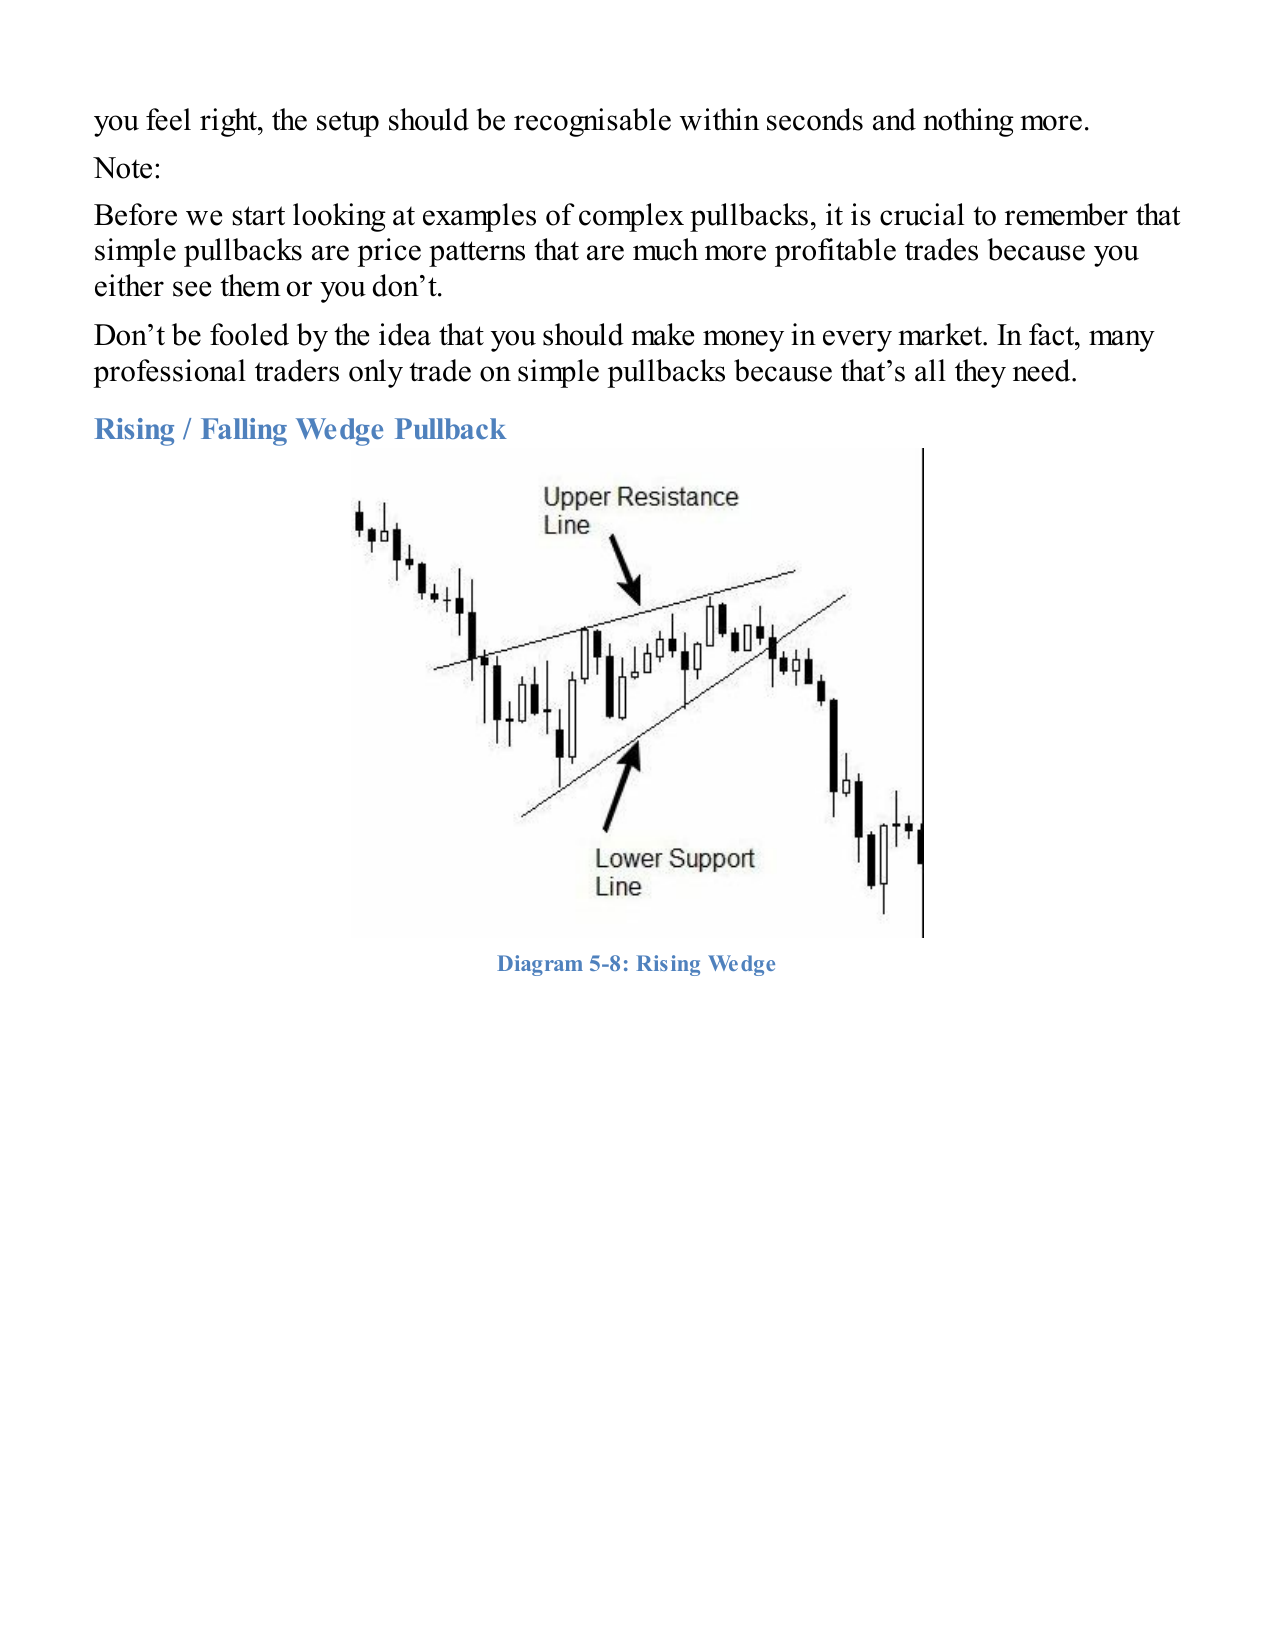
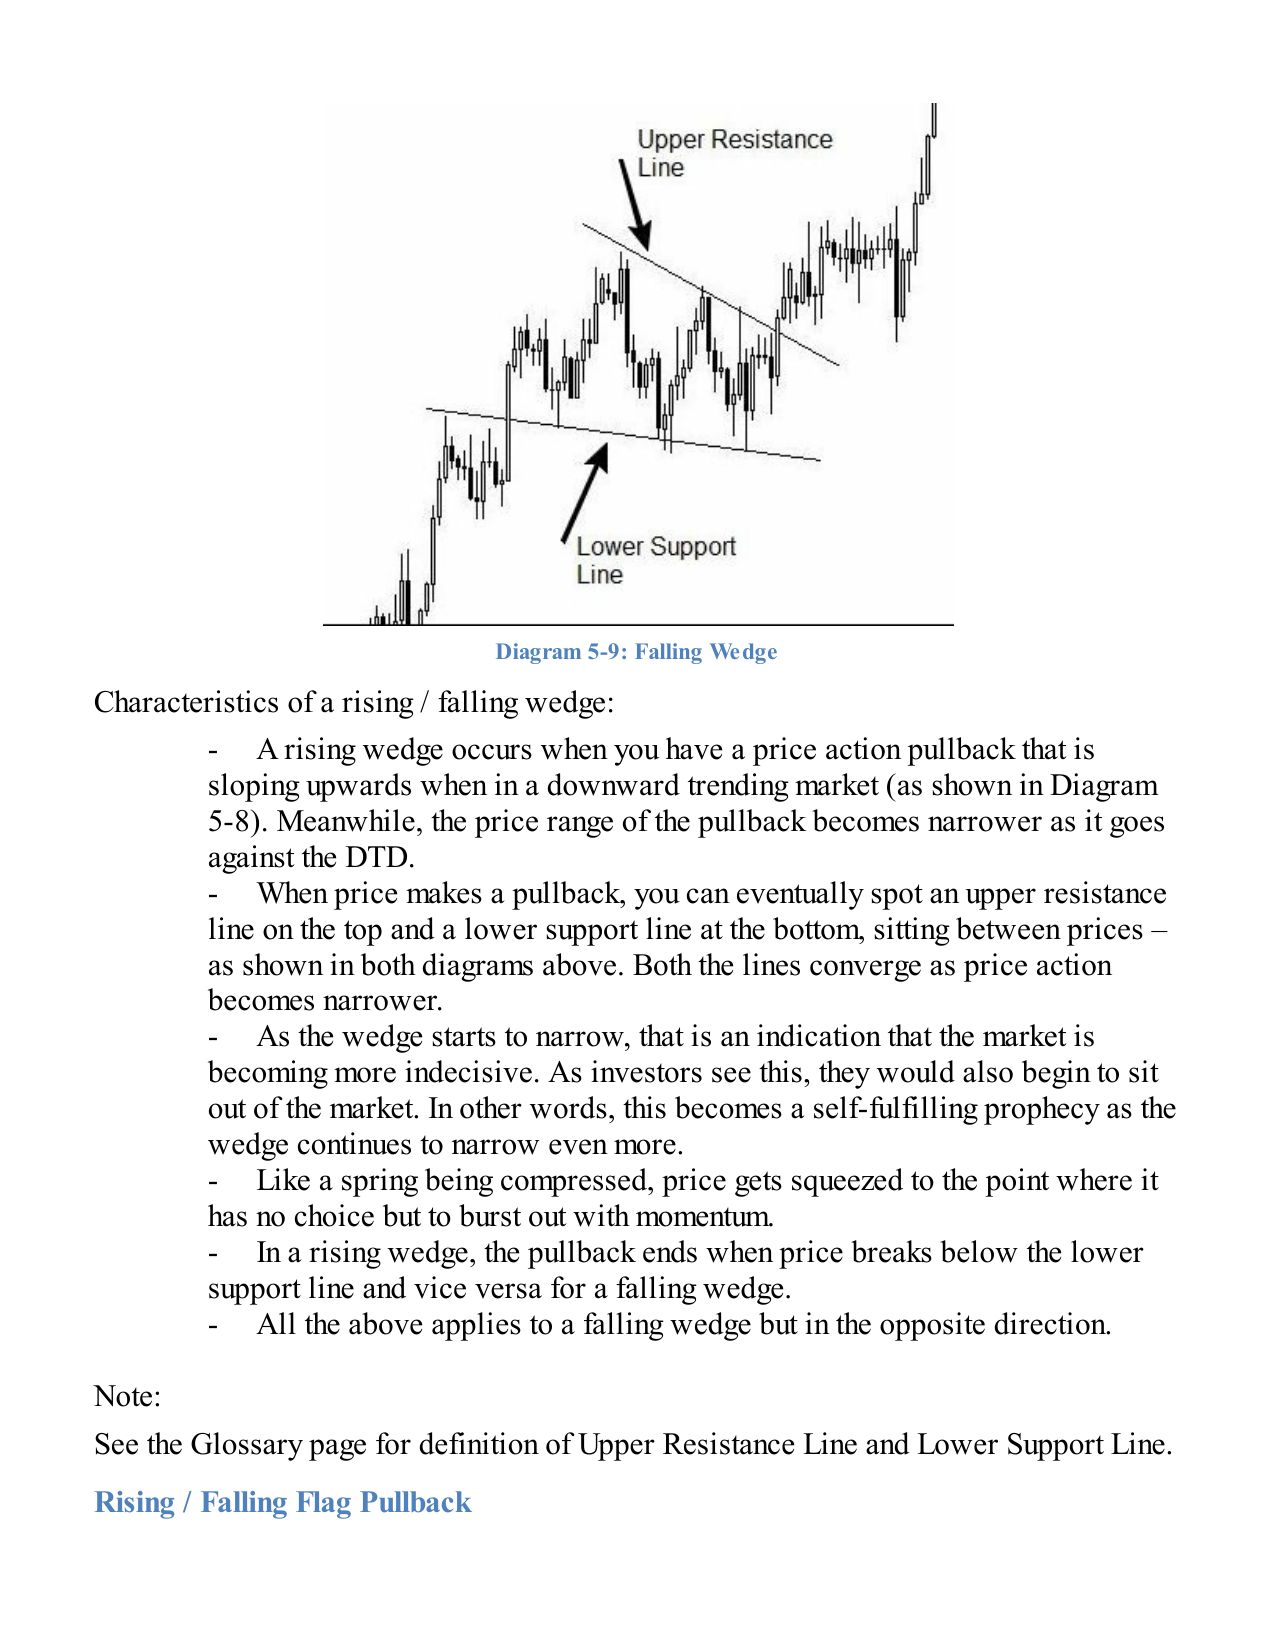
These diagrams from Alwin Ng's The Secrets of Trading the First Pullback sit alongside the rules above. Use them as visual reference points for structure, pullback types, invalidation, and first-pullback setups.
A-B-C-D structure and simple pullbacks
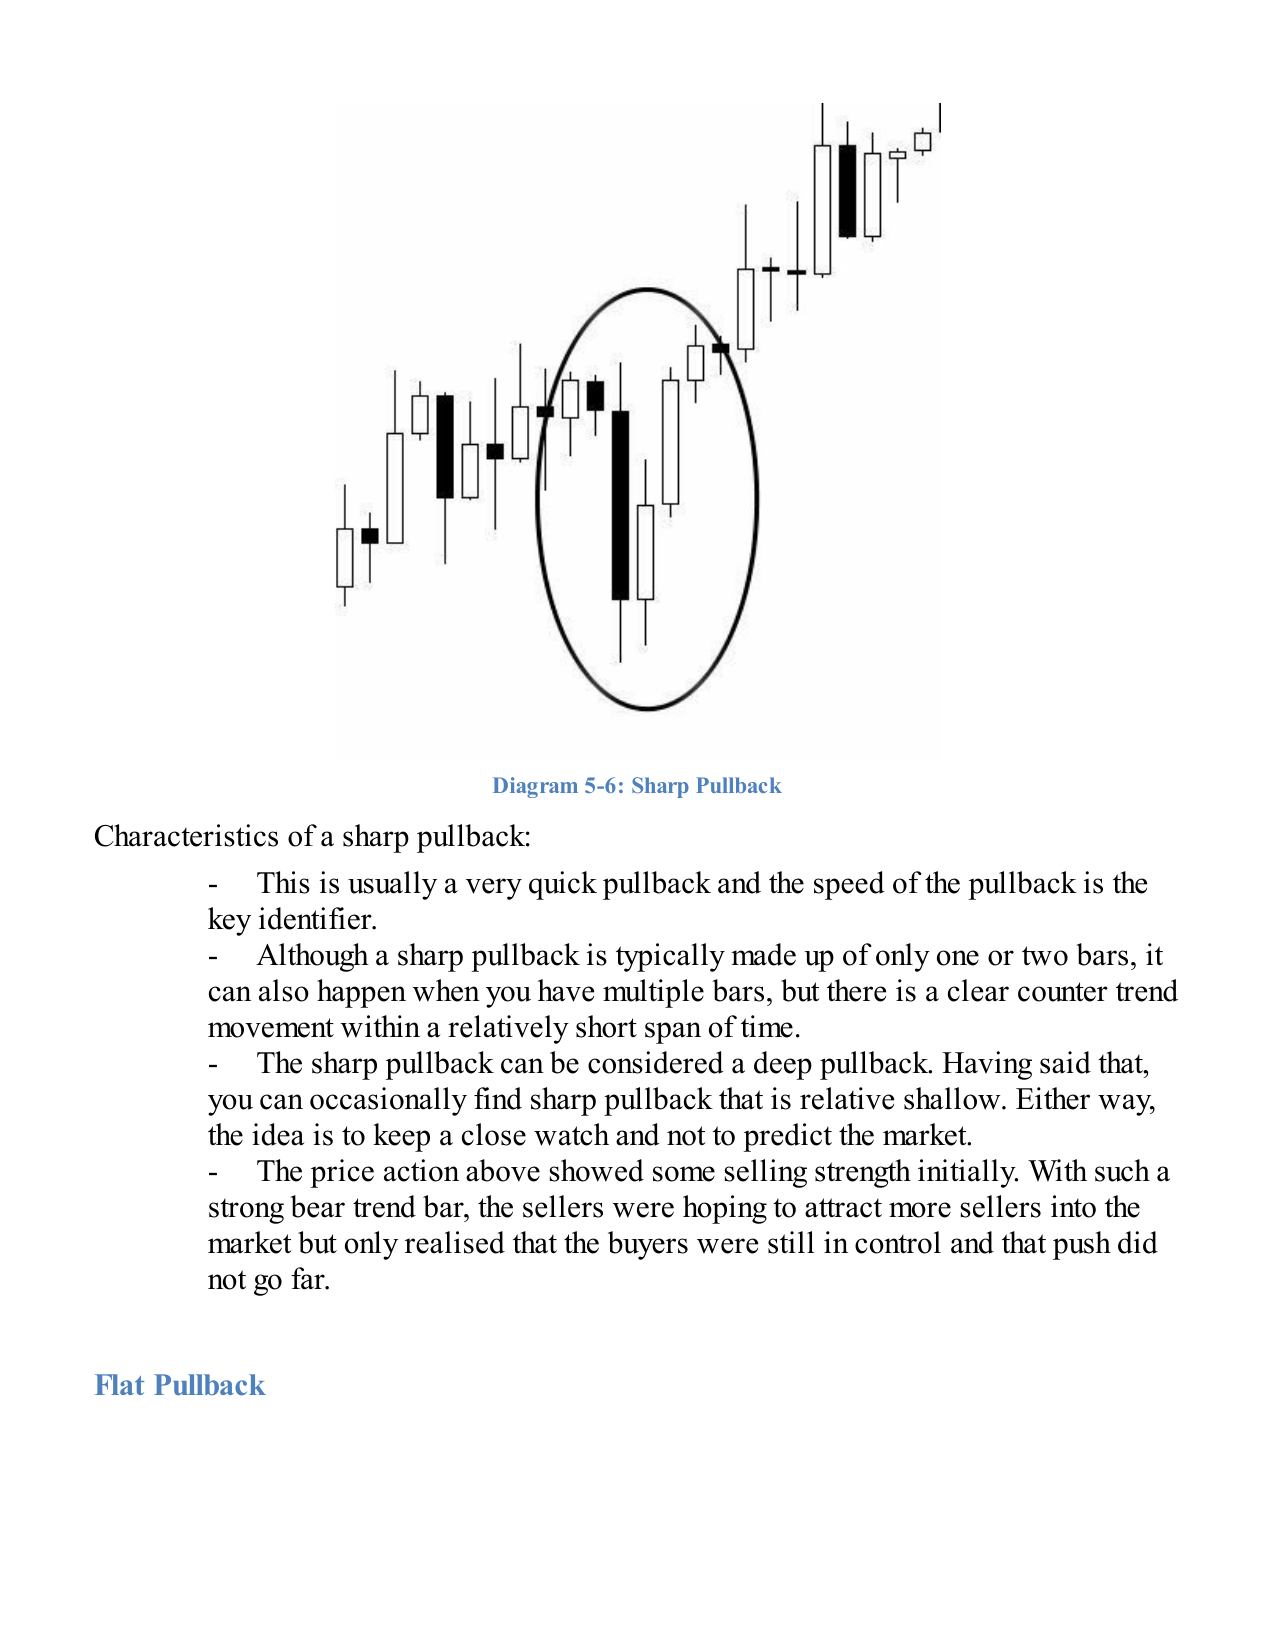
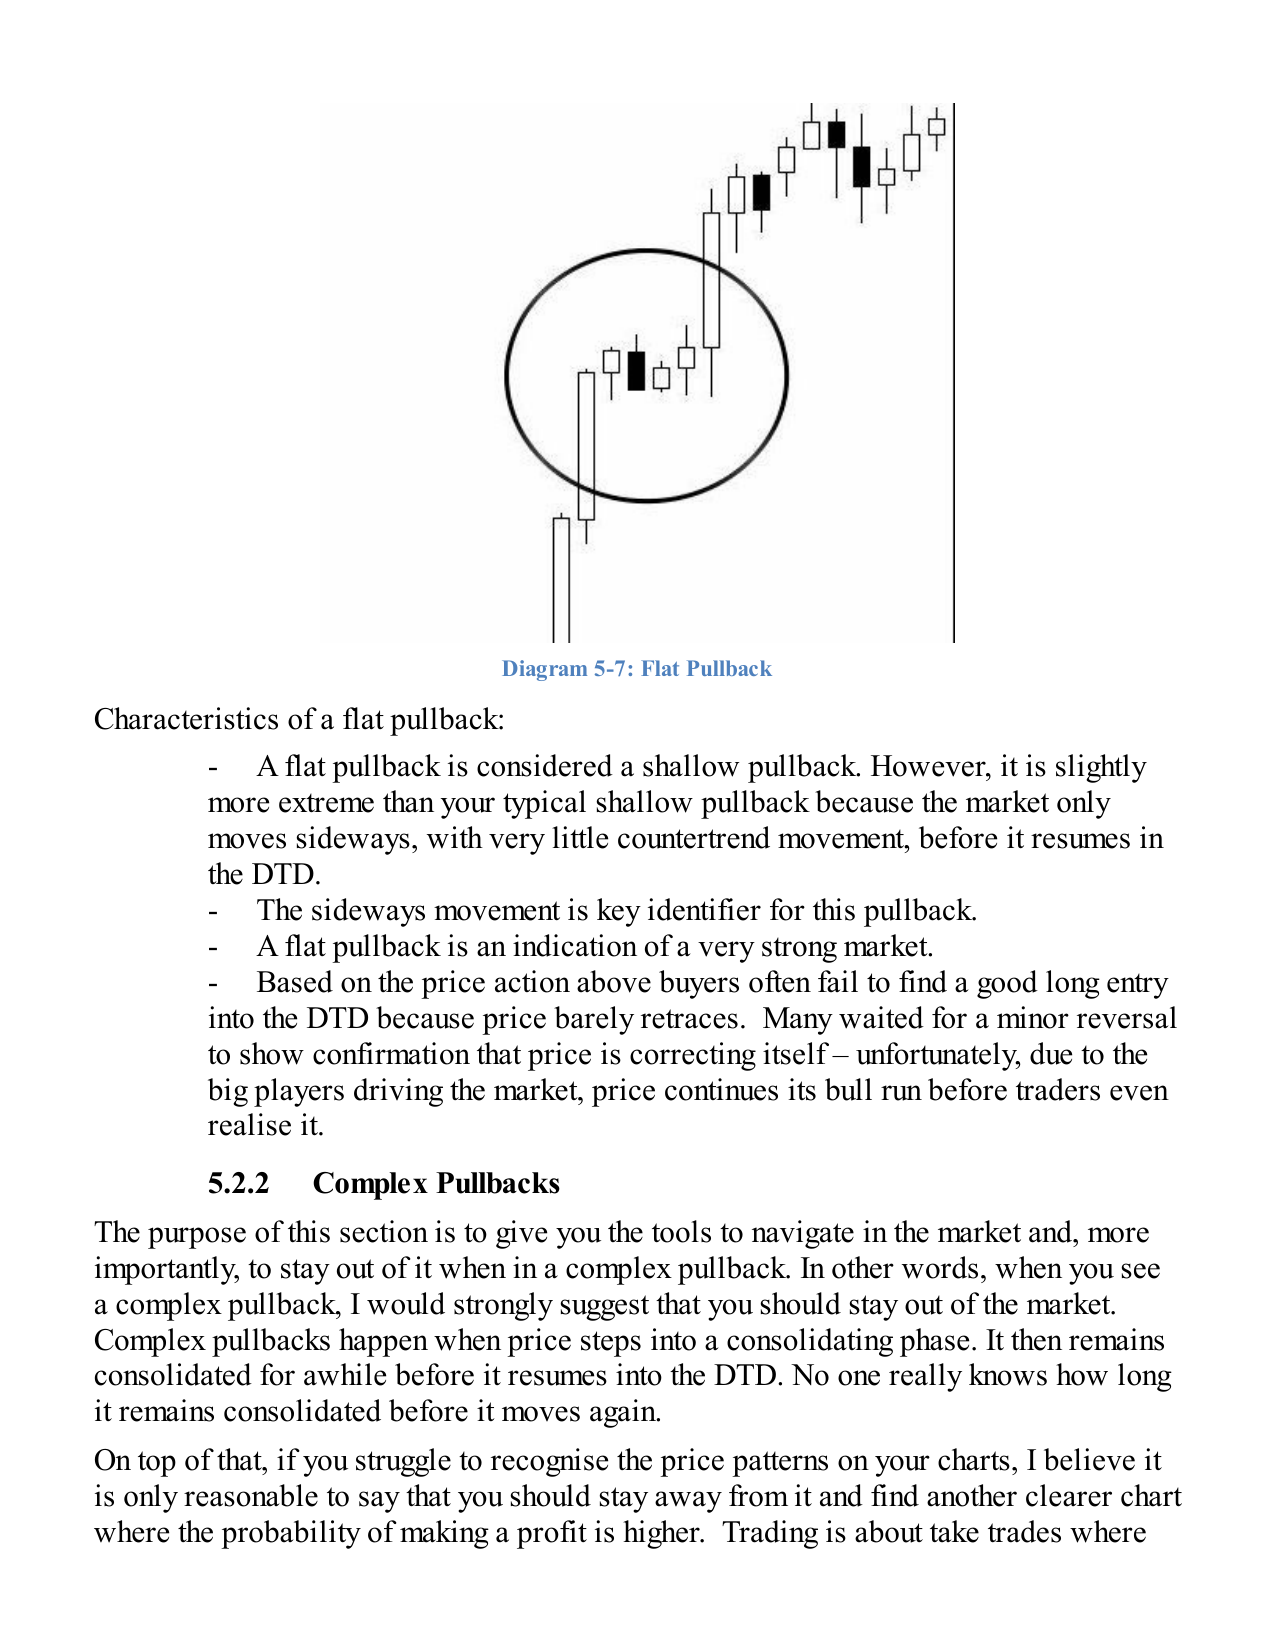
Complex pullbacks

Invalidation, conviction and first pullbacks
6. What Is Not a Pullback Entry?
| Chart Type | What It Looks Like | Correct Response |
|---|---|---|
| Vertical extension | Price is far above the 10/20 EMA, RSI is stretched, and candles are already large. | Do not chase. Wait for the next pullback, base, or flag. |
| Still falling | Price is entering the EMA zone, but there is no higher low, reclaim, or buyer reaction. | Watch only. The setup is not active until buyers reappear. |
| Heavy breakdown | Large red candles cut through the 20 EMA or breakout level on expanding sell volume. | Avoid. This is not controlled weakness. |
| Messy chop | Price keeps crossing moving averages with no clean trend or clear invalidation. | Pass or trade smaller only with an intraday trigger. |
7. Buy Zone vs Buy Trigger
Buy Zone
The buy zone is where price is worth watching. It is not the entry by itself.
- 10 EMA / 20 EMA area.
- Prior breakout level.
- VWAP on intraday trades.
- Previous resistance becoming support.
- Rising trendline support.
Buy Trigger
The trigger is evidence that the pullback may be ending.
- Break above previous candle high.
- Reclaim of the 10 EMA or 20 EMA.
- Higher low on the lower timeframe.
- Break of a small descending trendline.
- Green candle with improving volume.
8. Invalidation Rules
The fear that "this could be the one that keeps dropping" is solved by defining exactly where the setup is wrong.
- 20 EMA failure: if price closes decisively below the 20 EMA on heavy volume, the pullback is suspect.
- Pullback low break: if price breaks the low that defined the setup, the immediate trade is invalidated.
- Point A failure: if the pullback breaks the structural starting point of the impulse, the pattern has failed.
- Breakout retest failure: if old resistance does not act as support and price cannot reclaim it, the breakout has failed.
- Volume warning: falling on rising sell volume is different from drifting down on quiet volume.
9. Final Checklist Before Entry
- Is the stock or coin already in an uptrend?
- Was there a clear impulse move before the pullback?
- Is this an early pullback rather than the fifth or sixth pullback?
- Is the pullback controlled rather than violent?
- Is price near a logical support area?
- Has volume calmed on the pullback?
- Have buyers actually reappeared?
- Do I know exactly where the trade is wrong?
- Is the stop distance acceptable?
- Am I buying the turn, not the fall?